

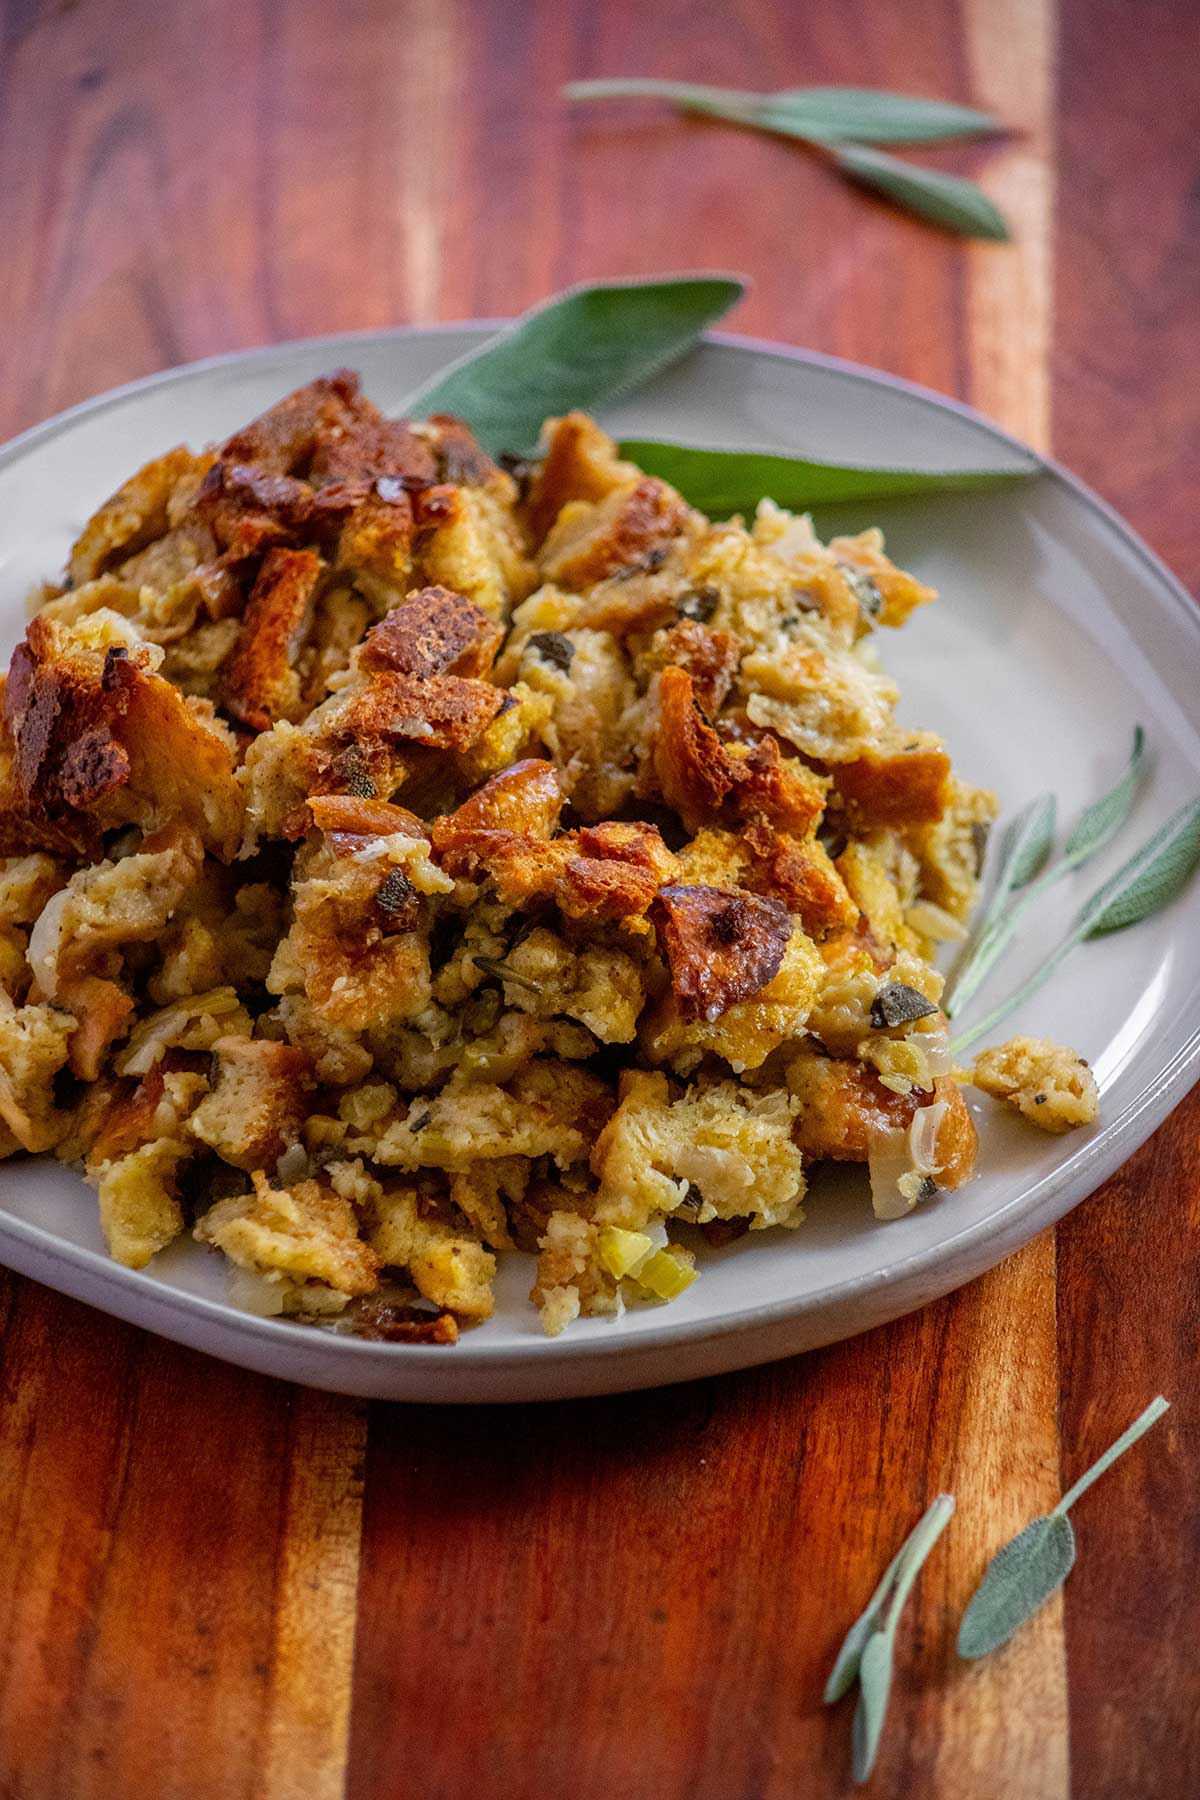
This Easy Crockpot Stuffing is a fast and easy take on old fashioned sage and onion stuffing! With a small amount of prep, this crockpot stuffing has got it all- crispy edges and a moist, flavorful center!
This easy Crockpot Stuffing is a Sage and Onion classic style stuffing, made in the slow cooker! for it's easy to prepare, with the perfect balance of moisture and crispy edges, for hands-off holiday cooking with plenty of flavor!
Keep your oven free for other dishes with just a little preparation and a 3 hour cook time! Once the stuffing is done, it will be moist and delicious in the center, and crispy on the edges. Best of all- you can just set the crockpot to warm until dinner is ready and serve it right from the crock pot!
I’ve been making stuffing for years and have tested multiple slow cooker versions to get the balance of flavor, moisture, and texture just right!

Jump to:
Why you'll love this Crock Pot Stuffing recipe
Hands-off cooking! With just a bit of prep, this recipe is truly set-it-and-forget-it, and cooks to perfection in about 3 hours in the slow cooker!
Classic Sage & Onion Flavor. This recipe uses fresh veggies and fresh sage for a classic stuffing flavor full of freshness!
Saves oven space! No watching the oven or juggling pans! The crockpot does all the work for you!

Ingredient Notes
To make this easy and delicious old fashioned sage and onion stuffing in the crockpot, you will need:
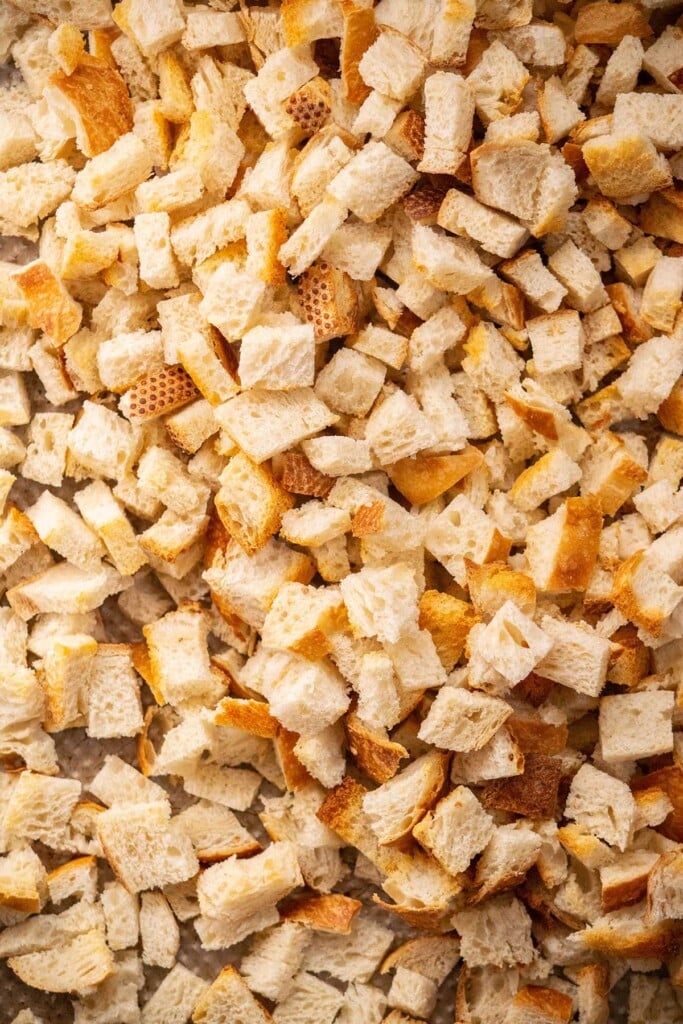
Sourdough bread. I love the tangy and slightly sour flavor of a good sourdough bread for this recipe. I prefer to toast my own bread, and cut it myself, as it adds a better texture to the final product. You could opt for pre-cut white bread or potato bread stuffing cubes if you like, but either use untoasted and toast them yourself according to the recipe, or use additional chicken stock to moisten them if they are pre-toasted to keep the stuffing moist.
Lots of butter. The butter will be used to grease the crockpot for a crisp exterior, as well as to sauté the celery and onion, and top the stuffing prior to cooking. The butter gives the stuffing flavor, texture and moisture.
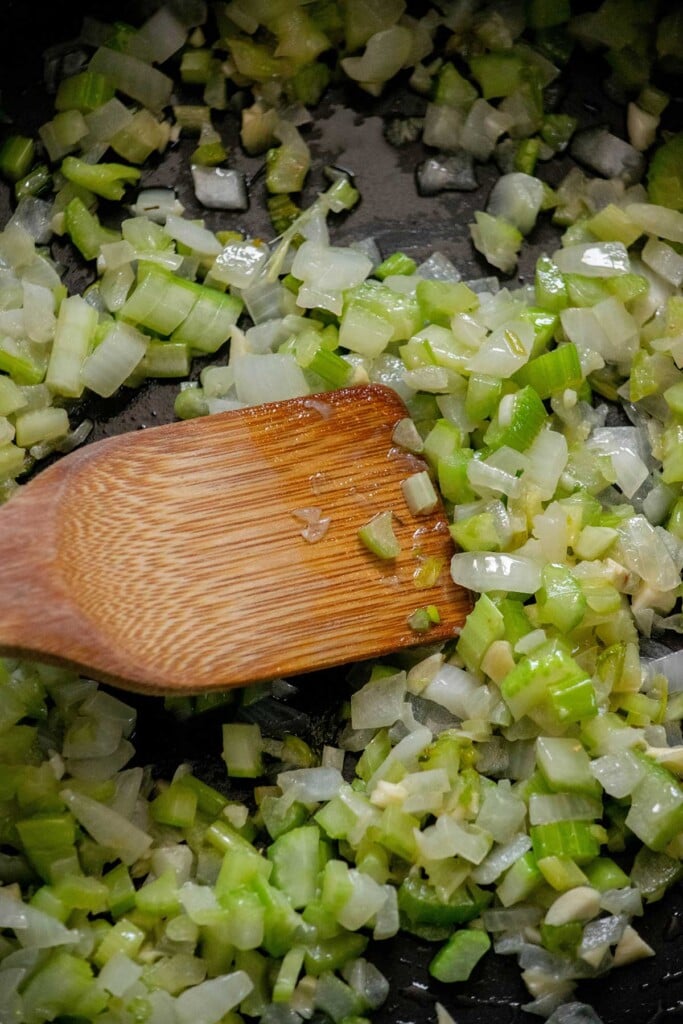
Celery, onion and garlic. No stuffing recipe is complete without these! I like to chop mine super tiny so they blend well into the stuffing. These add both flavor and moisture to the stuffing.
Chopped fresh sage leaves. You'll use about 1 whole 0.66 oz package, aka the little herb cases at the supermarket. The sage adds a huge hit of holiday flavor to the stuffing, and is way better than the dried stuff!
Store bought or homemade chicken or turkey stock. Use whatever you like, just make sure it is high quality for best flavor.
Eggs. These are crucial for keeping the stuffing moist!
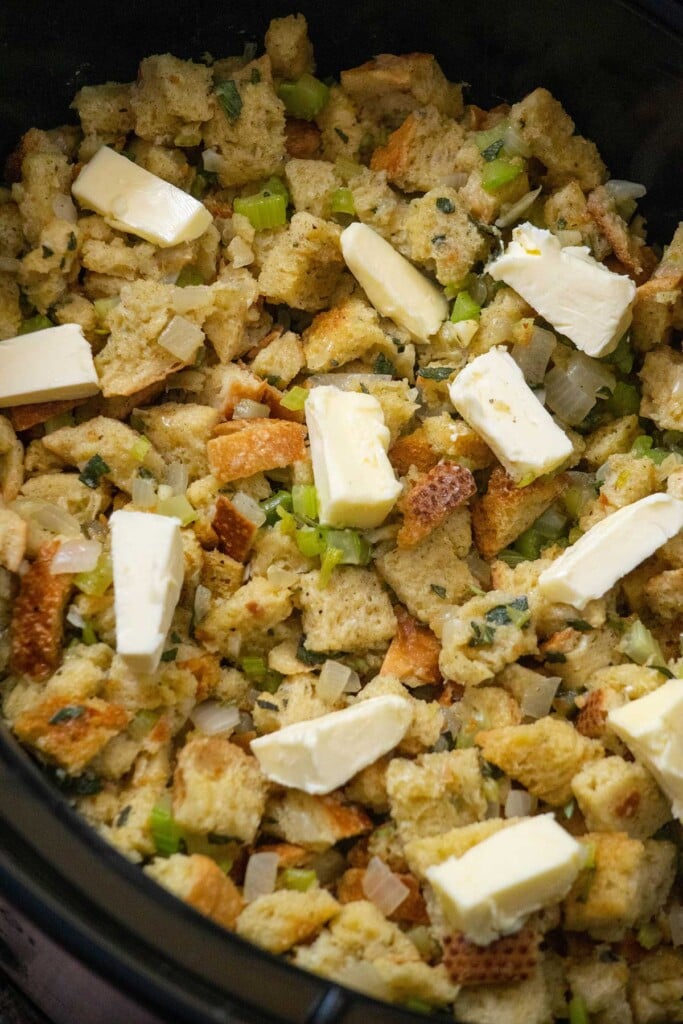
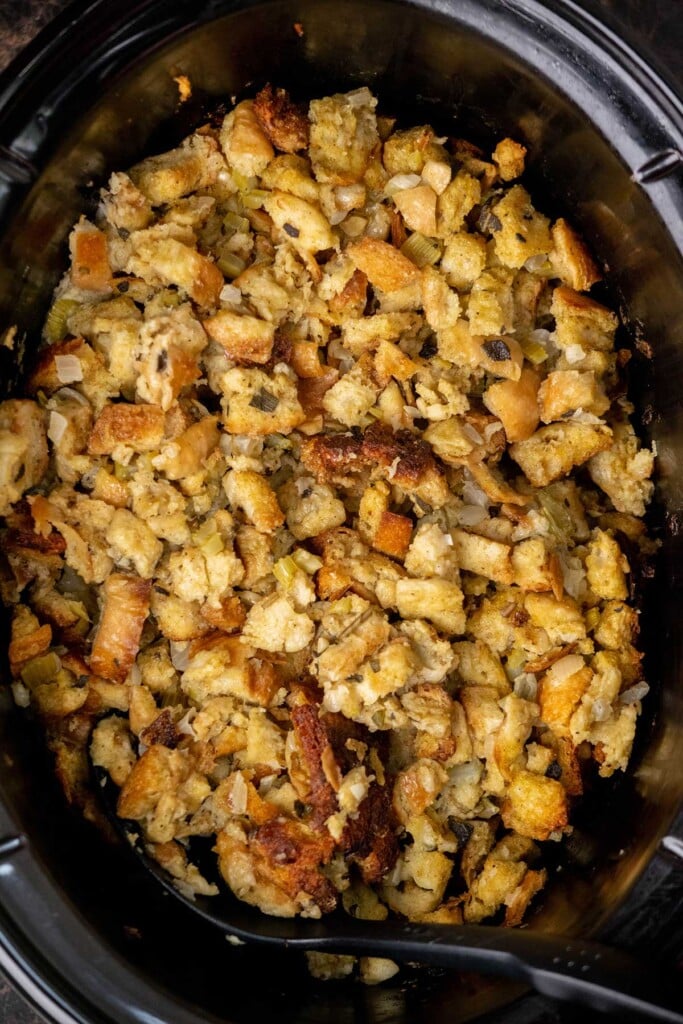
Step by Step Visual Guide
Below is step-by-step breakdown of how to make stuffing in your Crockpot!

Variations and Substitutions
Here are a few ways you can make this stuffing your own, or work with what you have on hand:
Save on prep time. Use pre cut untoasted stuffing cubes, and follow the toasting directions in the recipe.
Add some meat! Add cooked crumbled sausage to the stuffing blend before adding to the crockpot. You can cook it along with the celery and onion, and add to the remaining stuffing ingredients. Breakfast sausage is a great choice!
Add a different texture and flavor profile to your stuffing! Try potato bread or brioche instead of sourdough.
Add mushrooms! Add chopped button or baby bella mushrooms to the onion and celery mixture for extra flavor!
Make it an Apple and cranberry stuffing! Add some sautéed finely chopped apples and dried cranberries to the mixture!
Try a cornbread version! Use chopped and toasted cornbread in place of the sourdough bread for a Crockpot Cornbread Stuffing!


Easy Crockpot Stuffing Recipe
Equipment
- 5-7 quart crockpot/slow cooker
Ingredients
- 1 ½ lbs sourdough bread, cut into small 1” cubes
- 8 tablespoon butter, plus 2 tablespoon for greasing the crockpot
- 3 ribs of celery with leaves, finely chopped
- 1 medium-large onion, finely chopped
- 4 cloves garlic, minced
- ¼ cup chopped fresh sage leaves (about 1 whole 0.66 oz package)
- 2 teaspoon poultry seasoning
- 2 cups store bought or homemade chicken or turkey stock
- 3 large eggs
- 1 teaspoon salt
- ½ teaspoon fresh ground black pepper
Instructions
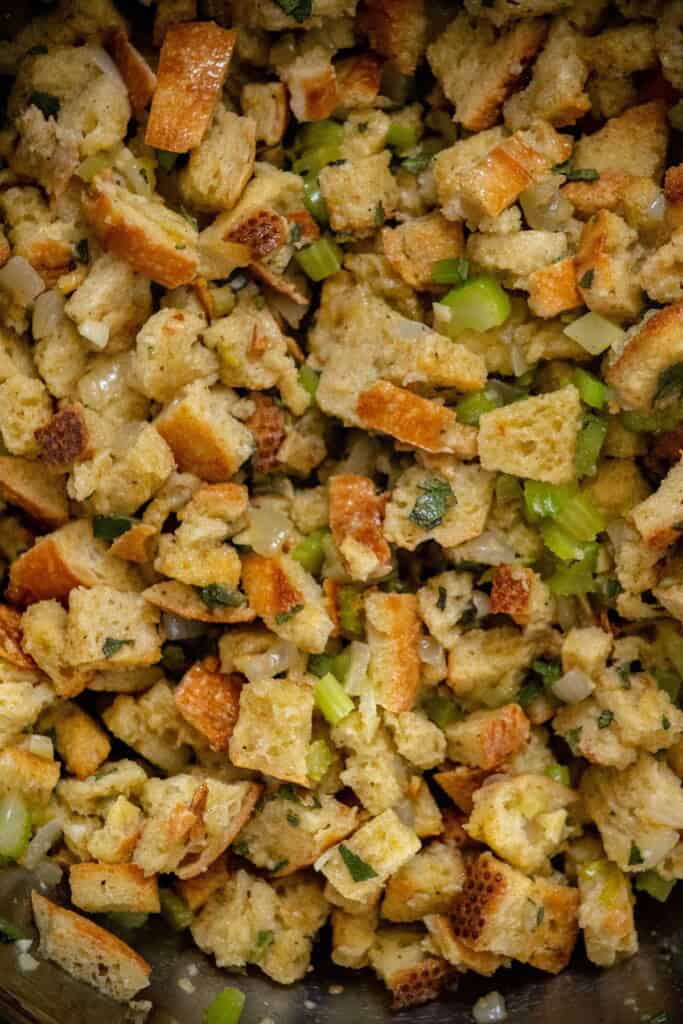
- Preheat oven to 400 degrees. 2. Grease crockpot with 2 tablespoon butter, and preheat crockpot to high. 3. Cut sourdough into small cubes, and distribute evenly onto 2 large sheet pans. 4. Place in preheated oven, and toast for 15-20 minutes, until dry and crispy. 5. While bread toasts, heat 4 tablespoon butter in a large deep frying pan or sauté pan over medium-low heat. 6. Add onion and celery, and season with salt. Cook 5-7 minutes until translucent. Add garlic and cook 1 minute until just fragrant. 7. Transfer cooked celery, onion and garlic mixture to a very large mixing bowl. Allow to cool. 8. Add chopped fresh sage, poultry seasoning, and eggs. Whisk to combine. 9. Add toasted bread, season with salt and pepper, and pour chicken stock over, and toss all ingredients until well combined. The mixture should be moist and easily come together when lightly pressed, but should not be "wet." 10. Transfer to crockpot, and reduce crockpot heat to low. 11. Top stuffing with remaining 4 tablespoon butter, cut into pats. 12. Cook 3-3.5 hours, until sides are crispy and inside is cooked through and fluffy. 13. Turn crockpot to warm until ready to serve, or serve immediately!
Notes
Nutrition
FAQ (Frequently Asked Questions)
How long do I cook the stuffing in the crockpot?
The stuffing takes between 3 and 3.5 hours to cook in the crockpot, once it is prepared. First, you will toast the bread, cook the celery, onion and garlic, and mix well with the wet ingredients. Greasing your crockpot with butter prior to cooking is key to not only get crispy edges, but also to prevent sticking.
What size crockpot should I use?
I recommend a 6-7 quart crockpot for this recipe!
Can this stuffing be made ahead of time?
Yes! You can prep the stuffing a day ahead, and store in the refrigerator in an airtight container until your ready to cook! Just don't forget to grease and preheat the crockpot to high for 20 minutes prior to setting to low for crispy edges!
Can I use a crockpot liner for this recipe?
While you technically could, I would advise against it if you want a crispier exterior.
Can I use gluten free bread for this recipe?
Yes! You can use any of your favorite gluten free breads for this recipe. Just note that gluten free bread usually has a bit of a denser texture, so adjust the amount of stock or broth you add to get to the best texture.
What if my stuffing looks dry?
if your stuffing is looking a little dry as it cooks, moisten it with a bit more stock.
Can I double the recipe?
Yes, but you may need to use 2 crockpots to accommodate it.
Is it safe to add raw sausage?
No, I would not recommend this. If you would like to add sausage to the stuffing, cook it with the celery and onion until no longer pink before adding to the stuffing mixture.
Why is my stuffing too wet?
If your stuffing came out too wet, the bread was not dry or toasted enough prior to adding the liquid, or you used too much broth. To fix it, add additional toasted bread to level it out.
What goes well with the stuffing?
This stuffing goes great with Smoked Turkey, Crockpot Turkey Breast, or Air Fryer Whole Chicken Recipe!

Storing Leftovers
Once the cooked stuffing is cooled, you can store any leftovers for up to 5 days in the fridge, either in an airtight container, or a ziplock bag.
The stuffing can also be frozen in an airtight container or freezer bag for up to 2 months!
More great Thanksgiving side dishes
Looking to wow your guests this Thanksgiving? Try one of these great side dishes!
Try my ultra creamy and decadent Browned Butter Boursin Mashed Potatoes!
Make a batch of my Smoked Oyster Stuffing with Mushrooms for a fun twist on classic stuffing!
Whip up a savory twist on Sweet Potatoes with my Scalloped Sweet Potatoes with Smoked Gouda and Rosemary!
Make my meaty Sourdough Stuffing with Bacon and Kielbasa!
Try my quick and easy Bacon and Brussels Sprout Skillet with shredded Brussels sprouts and plenty of bacon!
Make my Roasted Carrots and Parsnips with Honey-Thyme Butter and Goat Cheese!
Whip up a batch of my Make Ahead Green Bean Casserole!
© Jawns I Cooked. All images & content are the sole property of Jawns I Cooked. Please ask permission prior to using my photos. If you would like to share one of my recipes, please link back to this post and re-write the instructions in your own words.


Leave a Reply