

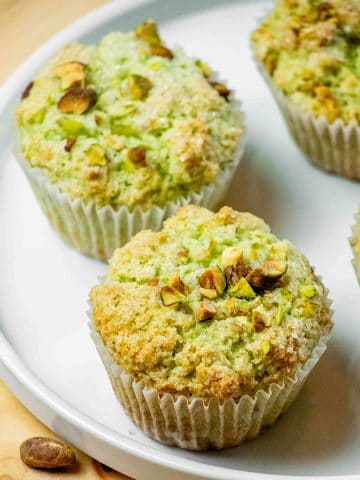
These easy Chocolate Pistachio Cookie Bars come together in a flash, for a simple, yet luxurious dessert that's great for a crowd! With a quick and simple crust and a gooey pistachio nut and chocolate texture, these irresistible pistachio squares are always a hit.
This site contains affiliate links to products. We may receive a commission for purchases made through these links.
Delicious and Shareable Pistachio squares!
These super-easy cookie bars will have you coming back for seconds of dessert! Loaded with chocolate chips and salty, nutty pistachios- these decadent treats couldn't be easier to make!

Looking for more great dessert ideas?
Why not try my Pear and Fig Galette, Banana Chocolate Chip Upside Down Cake, Pear Crumb Coffee Cake, or Coconut Caramel Apple Cake!

Making the Chocolate Pistachio Cookie Bars
To make these super-easy Cookie Bars, you will need:
- All-purpose flour.
- Light brown sugar, or granulated sugar.
- Melted butter.
- Some ground ginger.
- Some ground cinnamon.
- One beaten egg.
- A can of sweetened condensed milk.
- Some vanilla extract.
- Semisweet chocolate chips.
- Shelled pistachios, or shell them by hand, if you’re into that sort of thing.

Making the crust for the pistachio squares
To make the crust, simply whisk together the flour, spices and brown sugar, then stir in the melted butter with a fork until well combined. I like to melt my butter in a microwave-safe liquid measure on high for about 45 seconds to a minute.
Once the crust is all moistened and crumbly- you'll press it into a parchment paper lined 9x12 baking dish into an even, firm layer. Bake that off at 350 degrees for 15 minutes.

Making the filling for the Pistachio cookie bar recipe
While the crust gets it's bake on, Whisk up the egg, sweetened condensed milk, and vanilla. Fold in the chocolate chips and pistachios, and wait on that crust. Once it's out of the oven- pout that glorious goo all over, using a spatula or spoon to spread it evenly.
Pop the baking dish back into the oven for an additional 25 minutes, until the filling is set.
The hardest part? Waiting for the bars to cool so you can cut them and dig in!

For more delicious desserts, visit my desserts page!
If you make my Chocolate Pistachio Cookie Bars, please be sure to leave me a comment! I would love to hear from you, and value your feedback! Lastly, if you make the recipe and love it, please tag me on Instagram! I love to see your photos!

Chocolate Pistachio Cookie Bars
Ingredients
Crust
- 2 cups all-purpose flour
- ½ cup light brown sugar*
- 1 cup (2 sticks) melted unsalted butter
- ¼ teaspoon powdered ginger
- ¼ teaspoon powdered cinnamon
Filling:
- 1 egg
- 1 14 oz can sweetened condensed milk
- ½ teaspoon vanilla extract
- ½ cup semisweet chocolate chips
- 1 cup shelled pistachios*
Instructions
- Preheat the oven to 350 degrees.
- Spray a 9x12 baking dish with cooking spray and line with parchment paper.
- Make the crust: Whisk together dry ingredients. Add melted butter and stir with a fork until well incorporated. Pour into lined baking sheet and press with hands until firm and evenly spread out.
- Bake for 15 minutes.
- While the crust bakes, make the filling: Whisk together egg, sweetened condensed milk, and vanilla until well combined.
- Fold pistachios and chocolate chips.
- Once crust is finished baking, carefully pour filling on top and spread evenly.
- Return dish to the oven and bake for 25 minutes until filling is set.
- Remove from oven and allow to cool completely.
- Cut into squares and serve! Once cooled completely, store in an airtight container in a cool, dry place for up to 5 days.
Nutrition
*Notes/Substitutions:
If you don't have light brown sugar, regular sugar is fine!
Walnuts or Pecans are a great sub for pistachios if you don't have them on hand for this recipe!
© Jawns I Cooked. All images & content are the sole property of Jawns I Cooked. Please ask permission prior to using my photos. If you would like to share one of my recipes, please link back to this post and re-write the instructions in your own words.


Nicole M Krause says
Don't you mean 9x13 pan?
Sharon says
9x13 will work too!